
Open Windows Live writer. It's free you can download it here.
1. Open your Windows Live Writer.
2. Go to Blog Account > Blog Options> Update account information.

3. Add a blog account. Put the address of your blog there, your email address, password. Click next, a dialog box will open showing your blog account being set up.
After that a list of all of your blogs associated with that your mail will open up. Select any one which you want to edit.

4. It will ask you to download the template of your blog. Now, this is a very good option provided by Windows Live Writer. It downloads and installs the template of your blog and you can preview what your blog gonna look like.
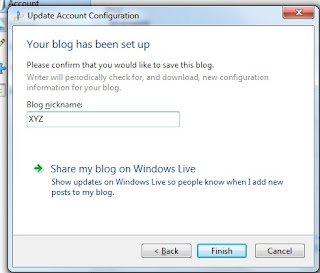
5. Set up Blog nickname- by default it displays the name of the blog. But you can change it to any. It won't affect the blog title.
Now you are ready to go. You can add post title, post body and if you want to add labels to your post just put it in the category bar. Before publishing you can Preview your blog from Live Writer only. It has a tab to preview in bottom.
But it never worked correctly in mine especially when photos are added to it. Preview on net and Windows Live Writer were different with photos.
You get two options to "Publish" and "Post draft to blog".
1. Open your Windows Live Writer.
2. Go to Blog Account > Blog Options> Update account information.

3. Add a blog account. Put the address of your blog there, your email address, password. Click next, a dialog box will open showing your blog account being set up.
After that a list of all of your blogs associated with that your mail will open up. Select any one which you want to edit.

4. It will ask you to download the template of your blog. Now, this is a very good option provided by Windows Live Writer. It downloads and installs the template of your blog and you can preview what your blog gonna look like.

5. Set up Blog nickname- by default it displays the name of the blog. But you can change it to any. It won't affect the blog title.

Now you are ready to go. You can add post title, post body and if you want to add labels to your post just put it in the category bar. Before publishing you can Preview your blog from Live Writer only. It has a tab to preview in bottom.
But it never worked correctly in mine especially when photos are added to it. Preview on net and Windows Live Writer were different with photos.
You get two options to "Publish" and "Post draft to blog".

No comments:
Post a Comment