Showing posts with label how-to-guide. Show all posts

Sunday, 1 February 2015

Battery Saver Mode on Android Explained

| Sunday, February 01, 2015 | | | | Be first to comment!


The latest version of Android i.e v5.0 Lollipop is full of new features and bugs. While Google is fixing the buggy part we thought of explaining the features to the masses. Lollipop is full of tiny little updates all over with a few new features that really stand out. After covering the priority notifications feature a few days back we thought of explaining the power saver mode on Android Lollipop.


One of the major issue with Android phones is the mediocre battery life. While a lot of people complain about it, the only fix that really worked was buying a phone with a bigger battery. This solution didn’t work for everyone though, phones with bigger batteries were heavy, bulky and had uninspiring design. Some of them had average specifications, keeping people away from buying such phones. The ones that did really everything well — like the Samsung Note series — had a hefty price tag. One of the methods to save the battery on the Android Phone is to tweak the software on it. On Android Lollipop they have done it with the implementation of Project Volta, which will only show improvement once app developers start implementing it.. But something that works very well even now is the inbuilt Power Saver mode in Lollipop.


The main purpose of the Power Saver mode is to save the battery when it is really required. The mode is automated and can activate from 2 points — When the battery reaches 15% and when it reaches 5%. Users can choose the from these two based on their preference. Along with  the automated setting, the mode can also be activated manually at any given point of time by going to Settings>Battery> Clicking Icon on the Top Right corner and switching it on. This should be done when you are away from a charger for a really long time to save the battery from draining out.


How Does Power Saver Work?


You might be curious as to how a minor software tweak can help the battery last longer. The answer lies in the way the mode works, when it is activated it switches off one or more cores of the processor, switches off animations and reduces background data. While this does affect the overall performance of the device, it manages to save the battery in the process. The data connection is still active for you to use but apps cannot access the internet unless you are using it. This reduces the data transfer between the apps and the internet, reducing the load on the already starving processor.


Does it really work?


My first doubt was if it would work as promised, so I switched it on with around noon with 94% battery still left on my Nexus 5. The system notifies that the power saver mode is on and changes the colour of the Status Bar and the Lower System buttons to Orange. There was a noticeable lag in the performance of the device, it took longer to open apps and games. Networking apps like WhatsApp and Facebook stopped showing notifications; in fact they only refreshed when the app was launched.


The main reason for the power saver mode is to get you through your day when you cannot charge your phone, which it manages to do well. We have seen Sony use something similar to extend the battery life on their smart phones where it completely disconnects the data 15 minutes after the screen switches off. I switched it on my Nexus 5 with the battery at 94% and the phone was at 77% after 7 hours of use. Generally my phone would have dropped down to 30-40% but it seems Power Saver was doing the job rather well. With the mode being a part of Android Lollipop we can expect it on upcoming smartphones soon. But if you ask if it works when its required the most the answer is a big YES!

Wednesday, 17 September 2014

How to add Microdata BlogPosting in Blogger?

| Wednesday, September 17, 2014 | | | | 4 Comments so far

Download a free template from any website or buy a premium one. All of the Blogger templates already have microdata added to them.
Add schema blog posting
BlogPosting Schema in Rich Snippet Testing Tool

What is microdata?

In simplest term, microdata is way to highlight some data from the whole to the search engines.

For example, you have a webpage about your company. It contains 3 paragraphs, in those there paragraphs you have -
  1. name of the company
  2. name of founder
  3. address
  4. phone number, etc. 
So, these are the minor details that can be highlighted.

How to add Microdata BlogPosting?

To add 
  1. Go to Template, then Edit HTML.
  2. Use Ctrl + F, to search for <data:post.body/>.
  3. You will only find one occurrence of the above code.
  4. Just above it add, <div itemscope='' itemtype='http://schema.org/BlogPosting><span itemprop='articleBody'>
  5. Just below <data:post.body/>, add </span></div>.
  6. Save it and you're done.
  7. To check, go to Google Structured Data Testing tool. Put any of your article's URL and hit Preview button.

Sunday, 24 August 2014

Make your Blogger Template load faster

| Sunday, August 24, 2014 | | | | | Be first to comment!

A fast loading website is a good website. In terms of both SEO and user experience. Google PR algorithm take into consideration time spent in downloading a page. Also, the bounce rate, that is, how many users left your blog as soon as they visited, without navigating to another article on your blog.

When, page takes time to load user leave your page. Increasing bounce rate.

minify javascript and css to make website load faster

Minify JS and CSS in Blogger

Minified JS is must. In blogger platform, you have to play with codes to tweak your template's/theme's looks. But even in that case, you'll find yourself playing with HTML and CSS not with JavaScript.

After minifying JS it almost becomes unreadable. Still you don't have to worry about it, because you don't need to read them at all.

NOTE- Online JS Minifier(s) won't compress all of your JS or jQuery codes. Because Blogger replaces some special characters like " into equivalent HTML entity or codes like &quot; which would throw errors like -

Unexpected operator &

If you are non-technical publisher then, all JavaScript are placed in-between script HTML tags.

<script type='text/javascript'>
//<![CDATA[
YOUR JS Codes are placed here
//]]>
</script>
So, now you know where your JS codes are.
  1. Cut all the codes in-between //<![CDATA[ and //]]>.
  2. Use any online JS minifier to generate minified code. 
  3. Copy minified code and paste it from where you took those codes (in-between //<![CDATA[ and //]]>).
There could be jQuery, that won't minify using the above tools. So, leave them for now. A lot of modern templates have JS minified already.

How to know if it is jQuery?

By the time you will minify some JS codes, you will realize that there are no $ signs in simple JavaScript code. In jQuery, the $ if the short hand of jQuery function used to select different tags and attributes from DOM or Document Object Model.

Also, some special characters are converted into equivalent HTML entities, like " sign will be converted into &quot; that's why the online minify tool will show an error.

Optimizing CSS

Similarly, CSS you can aslo minify CSS. There are a number of online tools available. CSS is placed in <style> and </style> tags. But remember when doing so, don't kill the sequence in which they appear.

Normally, I won't do that or else it will become very hard to tweak CSS. Other way round, is to copy your CSS into any file. If, you are not planning to tweak any style codes then feel free to minify CSS.

Optimizing Images in Blogger

Having low size images would help your blog load faster. But reducing the size of images all way down will kill the quality of the image. So, first crop the image and then work on quality reduction. Sometimes, the crop will reduce enough size.

How to know time spent during downloading a page?

time spent in downloading a page blogger
time spent in downloading a page

Google Webmaster tools lets you see the time spent downloading a page. Because you are on Blogger platform, so you will get the webmaster data without even verifying you blog.

Sunday, 17 August 2014

How to Bring back classic menu on Ubuntu?

| Sunday, August 17, 2014 | | | Be first to comment!

Newer versions of Ubuntu have perfectly handled the application search and access. Now, you only need to press that super key and type to search. So, the dash is just enough.

ALSO SEE: Customize Ubuntu for bloggers

In older versions, applications were accessed from classic menu. Some users still find it better for easily accessing applications and want classic menu back on Ubuntu.

classic menu on ubuntu 14.04
Classic Menu on Ubuntu 14.04
Using the above is completely user's choice some find it better others find it of no use. The layout and orientation is different from the original. But if you'll use it you'll get familiar in couple of hours.

To get Classic Menu-
  1. Go to software center and search for ClassicMenu Indicator, and Install it.

Friday, 15 August 2014

How to install Sublime Text theme on Netbeans?

| Friday, August 15, 2014 | | | Be first to comment!

PHP developers love Sublime Text. I have Sublime Text installed on Ubuntu. But Sublime Text is a text editor with modern features like code completion, syntax highlighting, etc.

For bigger projects or when you have to meet deadlines, you are required to use some IDE to decrease development time.

ALSO SEE: Install NetBeans IDE 8.0 on Ubuntu

sublime text theme for NetBeans IDE
Import Sublime Text theme

How to install Sublime Text theme on NetBeans IDE?

  1. Download Sublime Text theme.
  2. Open NetBeans, go to Tools then Options, and then Import.
  3. Browse and select the downloaded .zip file. And hit OK.
This will force your IDE to restart. After restart your theme will become active.

NOTE - Systax Highlighting is only applicable for HTML, CSS, XML and PHP codes only.

How to install NetBeans IDE 8.0 on Ubuntu?

| Friday, August 15, 2014 | | | Be first to comment!

NetBeans IDE 7.0.1 is available on Ubuntu's Software Center. But the latest stable version online is 8.0. Also using the method below you are required to get programming language specific bundle only.

If you are PHP developer, then why would you install IDE for Java or C or C++.

Installing Netbeans IDE 8.0

  1. Go to NetBeans official website and download the bundle required. There are 5 NetBeans bundle. NetBeans for Java SE, Java EE, C/C++, HTML5 & PHP, All (this package will support all individual bundles).
  2. The file downloaded will have a .sh extension.
  3. You have to make the file executable. To do so follow the steps below-
  • Right click on the file, select Properties.
  • Navigate to Permission Tab.
  • Check Allow executing file as program option.
Netbeans IDE 8.0 on Ubuntu 14.04
Making file executable
NOTE - In the above method, if Group has Read-only permission the above method won't work. As soon as you'll check it, it will automatically get unchecked.

Using terminal to make file executable

sudo chmod +x 'path/to/file.sh'
To execute

sudo bash 'path/to/file.sh'

The program will also search for JVM on your system. It will also automatically install some updates while installing like Symphony framework, etc. I did only PHP bundle installation.

Thursday, 1 May 2014

Adsense India got updated, get money via wire transfer

| Thursday, May 01, 2014 | | | Be first to comment!

Adsense is upgrading it's Payment page that will allow publishers to enjoy faster payment options. Along with this update, Adsense will discontinue providing payments by cheque. No more waiting for long time, and then rushing to bank to deposit your cheque. In case your city don't have any CitiBank branch, then it may take upto 14 days to get your cheque cleared.

But now, Adsense allows Wire transfers. With wire transfer, your funds will get transferred directly to your bank account.
change form of payment in Google Adsense

How to setup wire transfer in Adsense?

  1. Log-in into your Adsense account.
  2. Navigate to your "Payments" page and then to "Payment settings" tab.
  3. Click "Add a new form of payment", a form will open up. Fill all the details, account holder's name, bank name, IFSC number of your bank, SWIFT-BIC code and account number. All the other details are optional. Look if they apply in your case.
  4. Hit Save button.
setup wire transfer in Google Adsense


All Indian banks SWIFT-BIC codes are provided on http://www.theswiftcodes.com/india/. To get IFSC code use http://www.ifsccodebank.com/ website. Just to be on the safe side confirm these codes from your Bank.

More Control on your Billing

With new Payment page publishers can also control "Hold Payment" feature more efficiently. User can select date range to hold payments.

Also, Minimum threshold can be altered. Default value is still $100. Which can b changed to any value you like.

Author's Bio: Shubhashish Shukla (follow him) is the person behind Sector Techno (twitter, facebook), a technology blog. An always learning web developer.

Tuesday, 29 April 2014

How to change Time Zone in Google Adsense?

| Tuesday, April 29, 2014 | | | Be first to comment!

Analyzing Adsense revenue data allows Adsense publishers to keep a track on their revenue generation. Maximum revenue can come from a specific country, in a specific interval of time.

Change Time Zone in Google Adsense

Navigation
  1. Log-in into your Adsense Account.
  2. Switch to "Settings" page using the wheel icon from top right corner.
  3. Now, switch to "Account information" tab.
  4. Hit the "edit" link, in the Time Zone row. Time Zone are set to Pacific Time (-07:00) by default. Also, "Changing your time zone will affect AdSense performance reports for your account from today onwards. Your billing information will remain in Pacific Time."
  5. Hit Save button and your changes will take effect.

This means you billing cycle's time zone will continue using the default value. All of your billing process will be done in Pacific Time Zone.
change time zone in Google Adsense
Time Zone in Google Adsense
Now, you can view and analyze all of your Adsense data in your preferred time zone.


Author's Bio: Shubhashish Shukla (follow him) is the person behind Sector Techno (twitter, facebook), a technology blog. An always learning web developer.

Sunday, 27 April 2014

Top 10 Resources to learn photography from novice to pro

| Sunday, April 27, 2014 | | Be first to comment!

Photography, is key ingredient to capture memories as well as breath taking moments. Taking great photos are now a part of life. The list starts from Facebook, and continues to school or college magazines, pamphlets, websites, blogs, family albums, instagram, etc.

Or maybe you want to opt photography as your profession. You need to learn, practice and improve as much as you can.

Learn photography from novice to pro

1. Know your product with Nikon

I like NIKON DSLR's but I don't want to go biased on their product. But Nikon have a great video library for each of their products. Watch the videos to learn how to use DSLR cameras.

Along with the product other technical aspects are also explained in the videos, which may differ from camera to camera, but you'll learn something new about beginner level photography techniques.

2. Read Some great articles from Nikon

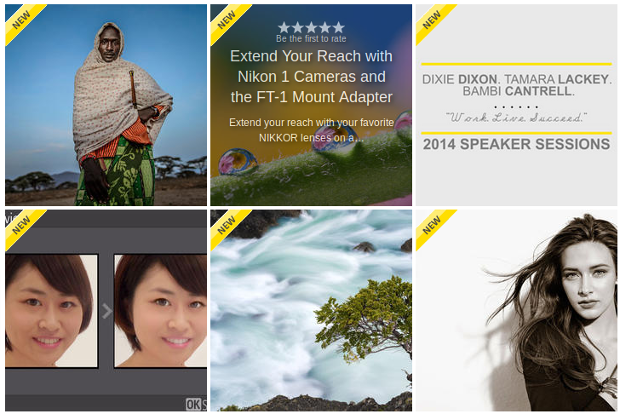
read article from Nikon and learn new tips on photography
Read more than 300 articles from Nikon
Reading great tips is just the perfect way to start. Take some dosage from the professionals. Learn topics like ISO, Macro, Aperture, Exposure, Flash, Close-Up, Focal Length, HDR, Panorama, etc.

One of the best features provided here is the ability to filter content on the basis of "Beginner content first", "Advanced content first", etc.

3. Digital Photography School

Well, if you want to be a pro. Learn from pro. Digital Photography School is maintained by Darren Rowse.

The site provides great tips and tutorials on -
"Tips for Beginners", "Portrait Photography", "Landscape Photography", "Lightroom tips", "Photoshop tips", "Camera and Equipments", etc.

4. Learn Basic Photography

Learn about types of camera, exposure, basic controls, exposure shutter speed, basic photography, tips while purchasing equipments, camera reviews, etc.

5. YouTube Channels

You might not be able to experiment all the tutorials present on YouTube. because of the expensive gears. But still there is the other side, that will help you in taking great pictures, portraits, landscapes, etc.

Here is a small list subscribe these -

6. Learn Photo editing tools

Great photos speak. That is the art, conveying messages from the image itself. A simple portrait photograph, will convey an entirely different message if black and white or sepia as compared to the one with vibrant colors.

You don't need to be a master in Adobe Photoshop or any-other professional software package. If you cannot afford Photoshop right now or photoshop looks hard to learn, go for open source alternatives. GIMP image editor and Paint .NET, etc.

 Here are some YouTube channel on Photo Editing tools -

7. Stock Images

This one is not exactly a resource to learn photography, directly. But if you can sell some of your work, then it is like automatic motivation. It will keep you going, at-least you will be taking photographs more professionally. You will learn from other people's work. Top sellers, recent uploads, high quality images, creativity, etc.

sell photographs online with stock image websites
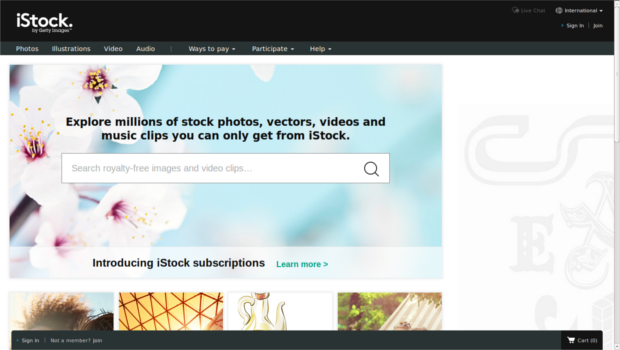
iStock stock image website
A small list of stock images websites-

8. Join Groups and communities

Joining groups or communities on Facebook, Google Plus, etc. is a great way to get help from other professionals photographers. All you need to do is ask question, you'll get your problems solved.

As you will learn, you will also be able to answer other users problems. This will help you in getting recognized as a photographer. You can build a fan base too.

9. Photography certifications

A car mechanic and an engineer, both can repair a car. The difference lies in the in-depth study of the subject. That applies when it comes to being a photographer.

Whenever you feel like getting the badge, go for a certification exam. It will help you in standing out from the crowd. You can easily get a job too. One such certification is PPA certification.

If you know more certification courses available national or international level. Please comment below ↓ ↓ ↓.

10. Get your hands dirty

This is the most important part of being a photographer. Your experience with different aspects of photography, is the best tutor, student and motivator.

Got any more resources, please comment below  ↓↓↓ and I'll add them in the list.

Author's Bio: Shubhashish Shukla (follow him) is the person behind Sector Techno (twitter, facebook), a technology blog. An always learning web developer.