Image re-size options are always given in any of the blogging platform, Blogger, WordPress, etc. But sometimes your image is a bit larger than the content area and thus your are required to opt for a smaller size, so that your image can be displayed without overflowing the posts display ares.
These re-sizes done by the blogging platform only changes the HTML markup of the of the image. These re-sizes can render the text in the screen shot blurred a bit, makes the text a bit harder to eyes, making it look like it is low quality image. And thus, your overall visual quality suffers.
Apps to take screen shots
Some of the apps that can be used are, Windows Snipping Tool, the best part about snipping tool is that the produced image is very low in size without a great harm to the quality of text in the screen shot.
ALSO SEE: Do conversions using Google Converter
Try WordPress self-hosted for free
Create offers on Facebook fan page
Other software include, ScreenGrab and Greenshot (I recommend green shot as it is packaged with a very lightweight editor with some options like obfuscate, which is best for pixelating confidential information in the screenshot like email, credit card number, etc.)
How to re-size your screenshots ?
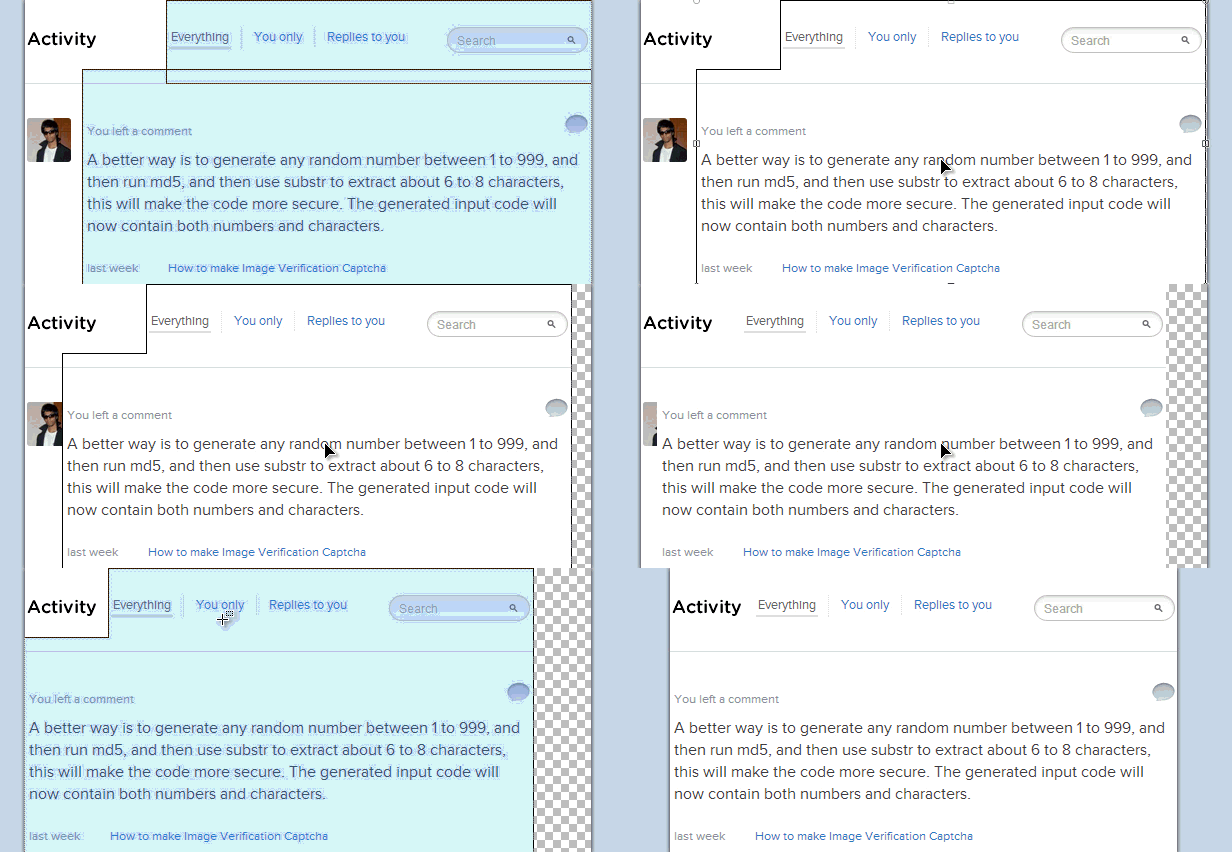
These are a series of steps that include cutting off the white-spaces from the images, and thus creating more of area to crop off. This is not applicable for full screen screenshots.
As I mentioned it is all about, curtailing off white-spaces that is removing the part of screen shots that have no content or content that can be ignored.
For this tutorial I will use Paint .NET. You can use other as long as they have some common functionality.
Now, no text in the image is visible, my aim is to re-size it down to less than 700px.
As you can see all the white-space is gone, and some not very important components have been cropped off.
What is removed-
 |
| Original Screen shot but it is 981px in width |
Re-sizing screenshot
- Open the image in Paint .NET.
- You are required to use only three tools, Rectangle Select (shortcut key S), Lasso Select (shortcut key S twice if on any tool except rectangle select), Move selected Pixels (shortcut key M).
 |
| Final Result Rendered 622 px wide from 981px |
 |
| Original with highlighted area to be removed |
- Information is parenthesis, erased using eraser.
- "Add Site" button removed using eraser.
- White-space between "Your Sites" column and the vertical divider removed using rectangular selection and move selected pixels.
 |
| Selecting and moving pixels |

No comments:
Post a Comment